Michael
I Love YTtalk
This is a quite in depth tutorial because it is for beginners and people who have never used Photoshop before and it is about how you can make your very own YouTube background yourself, I will go into some detail now and then where needed but a lot is self explanatory! Please note to view the images in full quality click on them and then right click and View Image to see full detail if you have any issues.
Theres a few essentials needed so let's get started:
1. Photoshop installed on your PC, any version higher than CS2 - I dont use any other editor so this one is Photoshop only unfortunately.
2. One of our YouTube template PSD files which you can download here:
http://pimpmychannel.com/youtube-background-template/
3. The ability to install a new font on your computer, if you have any issues with this just ask. A good place for fonts is DaFont.com.
4. You need to save this musicnotes.png (Right click and save as) to your computer so we can use it later in the tutorial:

Okay firstly open up the PSD file in Photoshop, double click the .psd file from wherever you have saved it to open it. What we are going to do is make a very basic background in Photoshop, apply some colour to it and then have our own personal touch added to it with some text.
Step 1:
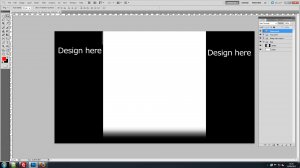
Open up the PSD in Photoshop if you havent already. It will look like this if you have the Cosmic Panda one:
Step 2:
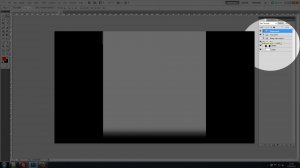
Switch off the visibility for the Group in the layers palette which is on the right like so:
Step 3:
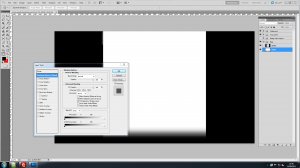
Open up the Base group by clicking the small arrow next to it and then right click the layer named BASE and click Blending Options like so:
Step 4:
Click where it says "Color Overlay" click it and then click the coloured square to open up the colour picker, we are going to choose a colour for its base, this can be any colour you like but I am going to use solid black #000000.
Step 5:
Now we are going to make a colour change to the side to help it blend in. Repeat the step from step 4 by right clicking the SIDES layer and choosing Blending Options. We can now click on Color Overlay again like before and choose a colour, I am going with another dark colour #001327.
Step 6:
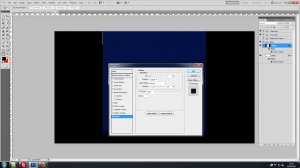
We can now start making things look a bit better, right click the SIDES layer and click Blending Options and click "Stroke" and copy the settings in the image below:
Step 7:
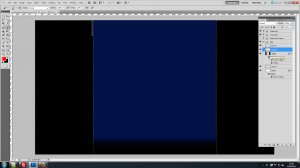
Hold down Control (Ctrl) on your keyboard and click on the layer icon for the SIDES layer, this will select the sides layer for you like so:
Step 8:
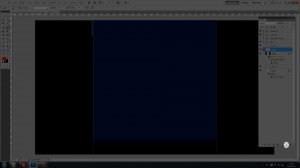
Now this is done we need to make a new layer, with the SIDES layer still active (highlight blue) we will click the New Layer icon found at the bottom right of the layers palette, the image below shows where this is for you:
Step 9:
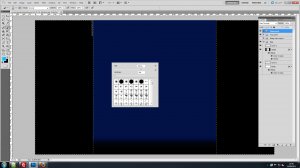
Now we have a new layer made we can now select the brush tool from the tools in Photoshop. To do this look at the image below. When you have it selected you can now right click anywhere on your canvas in Photoshop and adjust the brush size moving the sliders like so, also make sure to have a rounded brush but you are likely to already unless you have been using custom brushes:
Step 10:
With the SIDES layer still selected we can now click once at the top left of the inner section and once at the top right so you end with this:
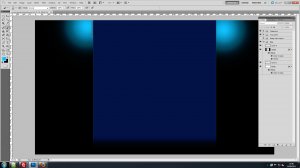
Make sure to select the colour first from the Tools on the left by clicking the foreground icon and selecting a nice bright blue.
Step 11:
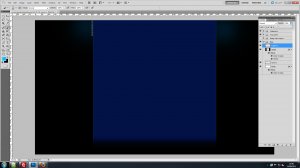
Once done you can now adjust the opacity of the layer by clicking where it says "Opacity: 100%" and adjusting its slider like in the following image, a lower percentage is best for this tutorial:
Step 12:
Okay now we are going to open the musicnotes.png and put it on our background. To do this find the file on your computer and drag and drop it into Photoshop, if this causes you issues right click the file and choose to open with Photoshop so you end up with it like so:
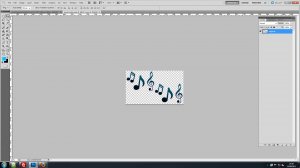
Once done press Control and A at the same time like any other keyboard shortcut and then press Control and X, this will select the music notes image and then cut it so you have a blank canvas. Now open up the background you have been working on and press Control and V which is paste.
Now you can select the Move Tool show below:
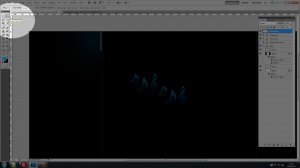
Click it and then click on your canvas and drag the music notes to the top right like so:
Make sure the music notes layer is above all the others in the layers palette, if not click and drag it to the very top.
Step 13:
Now we have our music notes added we are going to add some text, for this tutorial I am using a font from DaFont.com called Amsterdam Graffiti, you can use whatever you would like to use.
Okay, click the Text Tool like so and then click on your canvas, this will make a new text layer for you. Type in your channel name or other text on your keyboard, if you cant see the text right away dont worry at all as we will be revealing it in a moment.
When done click on the text layer in the layers palette to the right so it finalises the text editing and then right click on the layer and select Blending Options. Now click Gradient Overlay on the left of the Blending Option box and check Reverse on like so:
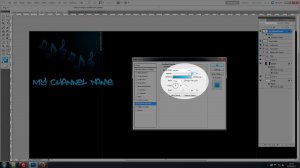
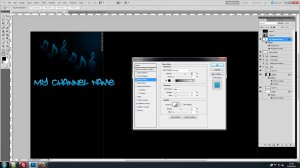
Now click on where the blue colours are in my image, yours may be black and white but it doesn't matter. Now we see the Gradient Editor, click the small coloured or black icon to the left and then enter this value where the # is like in the image below #3fc9f1 and do the same again for the right icon but with this value #028cb4. Once done click Ok. Now in the Blending Options click Outer Glow. Once you have done that please copy the values below:
Step 14:
Now we have done the Outer Glow we can move onto making the text smaller and rotating it a little. To do this click the text layer once in the layers palette and then press Control and T, this allows us to freely transform the text, holding down the Alt key on your keyboard and Shift at the same time clicking the top right handle or arrow and dragging inwards on itself like so:
View attachment 36
When you are happy with the text size hit Enter or Return on your keyboard to finalise the transform.
Now at the top of Photoshop click Edit>Transform> Rotate 90 CCW this will rotate the layer 90 degrees counter clockwise.
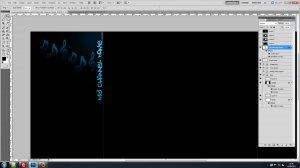
Now click the Move Tool again like earlier and drag the text to where you would like it, I have it like so:
Now you may notice you can see the PimpMyChannel.com watermark there below it or above it, to turn it off simply click the Watermark group visibility off like we done earlier with the Design Here group.
Here is the finished background which you can check out before starting:
View attachment 39
Thats all everyone, a very basic but in depth tutorial for beginners on making your own backgrounds. If you have any questions or notice any errors please let me know and I will help out.
Thanks for reading and I hope you enjoy making your own
Theres a few essentials needed so let's get started:
1. Photoshop installed on your PC, any version higher than CS2 - I dont use any other editor so this one is Photoshop only unfortunately.
2. One of our YouTube template PSD files which you can download here:
http://pimpmychannel.com/youtube-background-template/
3. The ability to install a new font on your computer, if you have any issues with this just ask. A good place for fonts is DaFont.com.
4. You need to save this musicnotes.png (Right click and save as) to your computer so we can use it later in the tutorial:

Okay firstly open up the PSD file in Photoshop, double click the .psd file from wherever you have saved it to open it. What we are going to do is make a very basic background in Photoshop, apply some colour to it and then have our own personal touch added to it with some text.
Step 1:
Open up the PSD in Photoshop if you havent already. It will look like this if you have the Cosmic Panda one:

Step 2:
Switch off the visibility for the Group in the layers palette which is on the right like so:

Step 3:
Open up the Base group by clicking the small arrow next to it and then right click the layer named BASE and click Blending Options like so:

Step 4:
Click where it says "Color Overlay" click it and then click the coloured square to open up the colour picker, we are going to choose a colour for its base, this can be any colour you like but I am going to use solid black #000000.
Step 5:
Now we are going to make a colour change to the side to help it blend in. Repeat the step from step 4 by right clicking the SIDES layer and choosing Blending Options. We can now click on Color Overlay again like before and choose a colour, I am going with another dark colour #001327.
Step 6:
We can now start making things look a bit better, right click the SIDES layer and click Blending Options and click "Stroke" and copy the settings in the image below:

Step 7:
Hold down Control (Ctrl) on your keyboard and click on the layer icon for the SIDES layer, this will select the sides layer for you like so:

Step 8:
Now this is done we need to make a new layer, with the SIDES layer still active (highlight blue) we will click the New Layer icon found at the bottom right of the layers palette, the image below shows where this is for you:

Step 9:
Now we have a new layer made we can now select the brush tool from the tools in Photoshop. To do this look at the image below. When you have it selected you can now right click anywhere on your canvas in Photoshop and adjust the brush size moving the sliders like so, also make sure to have a rounded brush but you are likely to already unless you have been using custom brushes:

Step 10:
With the SIDES layer still selected we can now click once at the top left of the inner section and once at the top right so you end with this:

Make sure to select the colour first from the Tools on the left by clicking the foreground icon and selecting a nice bright blue.
Step 11:
Once done you can now adjust the opacity of the layer by clicking where it says "Opacity: 100%" and adjusting its slider like in the following image, a lower percentage is best for this tutorial:

Step 12:
Okay now we are going to open the musicnotes.png and put it on our background. To do this find the file on your computer and drag and drop it into Photoshop, if this causes you issues right click the file and choose to open with Photoshop so you end up with it like so:

Once done press Control and A at the same time like any other keyboard shortcut and then press Control and X, this will select the music notes image and then cut it so you have a blank canvas. Now open up the background you have been working on and press Control and V which is paste.
Now you can select the Move Tool show below:

Click it and then click on your canvas and drag the music notes to the top right like so:
Make sure the music notes layer is above all the others in the layers palette, if not click and drag it to the very top.
Step 13:
Now we have our music notes added we are going to add some text, for this tutorial I am using a font from DaFont.com called Amsterdam Graffiti, you can use whatever you would like to use.
Okay, click the Text Tool like so and then click on your canvas, this will make a new text layer for you. Type in your channel name or other text on your keyboard, if you cant see the text right away dont worry at all as we will be revealing it in a moment.
When done click on the text layer in the layers palette to the right so it finalises the text editing and then right click on the layer and select Blending Options. Now click Gradient Overlay on the left of the Blending Option box and check Reverse on like so:

Now click on where the blue colours are in my image, yours may be black and white but it doesn't matter. Now we see the Gradient Editor, click the small coloured or black icon to the left and then enter this value where the # is like in the image below #3fc9f1 and do the same again for the right icon but with this value #028cb4. Once done click Ok. Now in the Blending Options click Outer Glow. Once you have done that please copy the values below:

Step 14:
Now we have done the Outer Glow we can move onto making the text smaller and rotating it a little. To do this click the text layer once in the layers palette and then press Control and T, this allows us to freely transform the text, holding down the Alt key on your keyboard and Shift at the same time clicking the top right handle or arrow and dragging inwards on itself like so:
View attachment 36
When you are happy with the text size hit Enter or Return on your keyboard to finalise the transform.
Now at the top of Photoshop click Edit>Transform> Rotate 90 CCW this will rotate the layer 90 degrees counter clockwise.
Now click the Move Tool again like earlier and drag the text to where you would like it, I have it like so:

Now you may notice you can see the PimpMyChannel.com watermark there below it or above it, to turn it off simply click the Watermark group visibility off like we done earlier with the Design Here group.
Here is the finished background which you can check out before starting:
View attachment 39
Thats all everyone, a very basic but in depth tutorial for beginners on making your own backgrounds. If you have any questions or notice any errors please let me know and I will help out.
Thanks for reading and I hope you enjoy making your own


